Outdoor solar pathway lights, while beautiful, can suffer wear and tear over time due to exposure to the elements. However, there’s a simple and cost-effective way to restore them to their former glory using an unexpected tool: nail polish. In this article, we’ll take you through the step-by-step process of rejuvenating your outdoor solar pathway lights.
Why Solar Pathway Lights Age
Before we get into the restoration process, it’s important to understand why these lights show signs of aging. Solar pathway lights endure various weather conditions, including sunlight, rain, and temperature fluctuations. This exposure can lead to issues such as faded or uneven coloration, cloudy and splotchy solar panels, bent or dimpled poles, and general wear and tear.
The Restoration Process: Step by Step
Step 1: Disassembly and Cleaning
- Carefully disassemble each solar light, separating the poles, light caps, and glass domes.
- Thoroughly clean each component to remove dirt and debris.
- Organize the components for easy restoration.
Step 2: Preparing for Painting
- Tape off the integrated solar panels on each light cap using painter’s tape.
- Choose a suitable paint color – classic black is a great option for a clean and updated look.
- Apply 3-4 coats of semi-gloss black protective enamel spray paint to each component, ensuring even coverage.
Step 3: Applying Nail Polish for Clear Solar Panels
- Remove the painter’s tape from the solar panels.
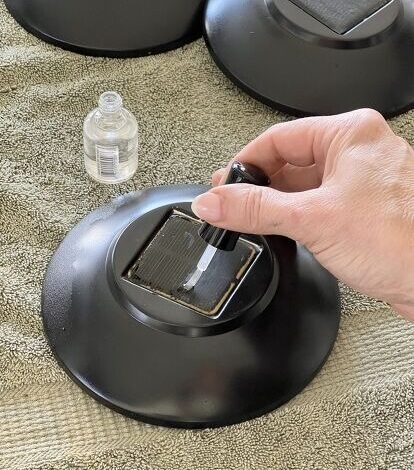
- Brush a thin coat of clear nail polish onto each plastic solar panel.
- Allow the nail polish to dry and set the lights in direct sunlight for at least 24 hours.

Step 4: Reassembly and Placement
- Once all components are dry, reassemble the solar lights.
- Space the lights evenly, approximately 6-8 feet apart, for optimal illumination.
- Consider alternating lights for symmetrical lighting along a pathway.
Step 5: Enjoy the Radiant Glow
With the restoration complete, your solar pathway lights will once again emit a warm and inviting glow, enhancing the beauty of your outdoor space. These revitalized lights will cast a lovely illumination on walkways, flower beds, and other areas, creating a magical ambiance during the evening hours.
Where to Place Your Restored Solar Lights
The versatility of solar lights allows you to place them in various locations, enhancing different areas of your outdoor space. You can place them along sidewalks and pathways, outline flower beds or landscape borders, near front door steps, inside flower pots or hanging baskets, accentuate water features, illuminate patio tables, or combine them with string lights and fairy lights for a multi-source lighting effect.
Bringing your solar pathway lights back to life with nail polish is a simple yet effective way to extend their lifespan and save money. Following these easy steps, you can enjoy the radiant glow of your restored lights, adding both functionality and charm to your outdoor oasis. Illuminate your garden with renewed brilliance and take pride in your DIY accomplishment!


